Google Tag Manager first launched in 2012, although despite its powerful features, it’s still not widely utilised by websites. The second version of the interface, known as Google Tag Manager V2, or GTM V2, provides a more intuitive and easy-to-use tool whilst still providing the same powerful features. Here’s what you need to know to get started with GTM V2.

What is Google Tag Manager?
GTM is a powerful tool that gives marketers and webmasters more control and flexibility over a website’s code and tracking. It enables marketers without development experience to implement important functions or features such as event tracking, Schema and much more from within a simple, smart interface.
You can read more about the tool on the GTM FAQs page or check out Google’s introduction to the tool in this short video:
So, what’s new?
For anyone who already used or has used the original GTM, Version 2 is visually very different so it can take a minute to get used to.
The look and feel is now much closer to that of other Google properties, such as Analytics and Webmaster Tools, which makes it somewhat easier to navigate once you adjust to the new layout:
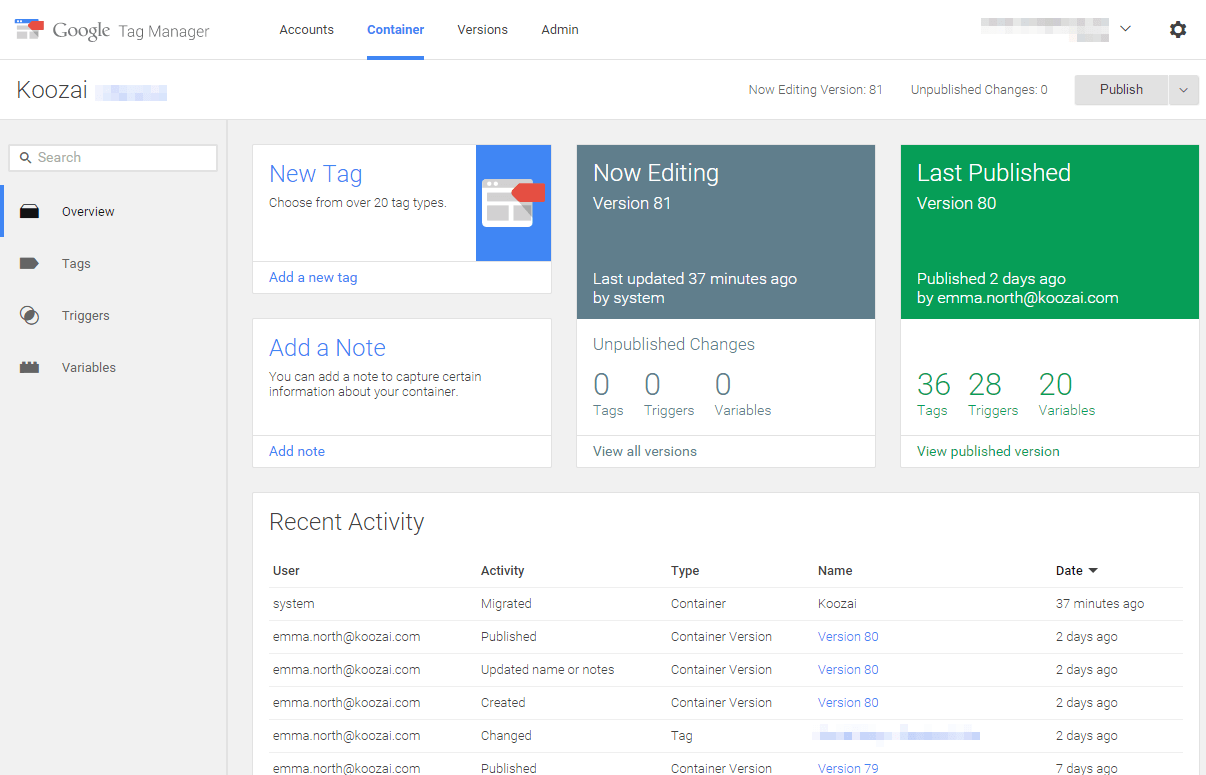
One change to be aware of is the renaming of Rules and Macros, which are now Triggers and Variables respectively. These work in very much the same way, but the names now make a little more sense. Setting these up though, like tags, is definitely a little different.
Version control is very much the same, but like the rest of the interface it’s set up a little differently:
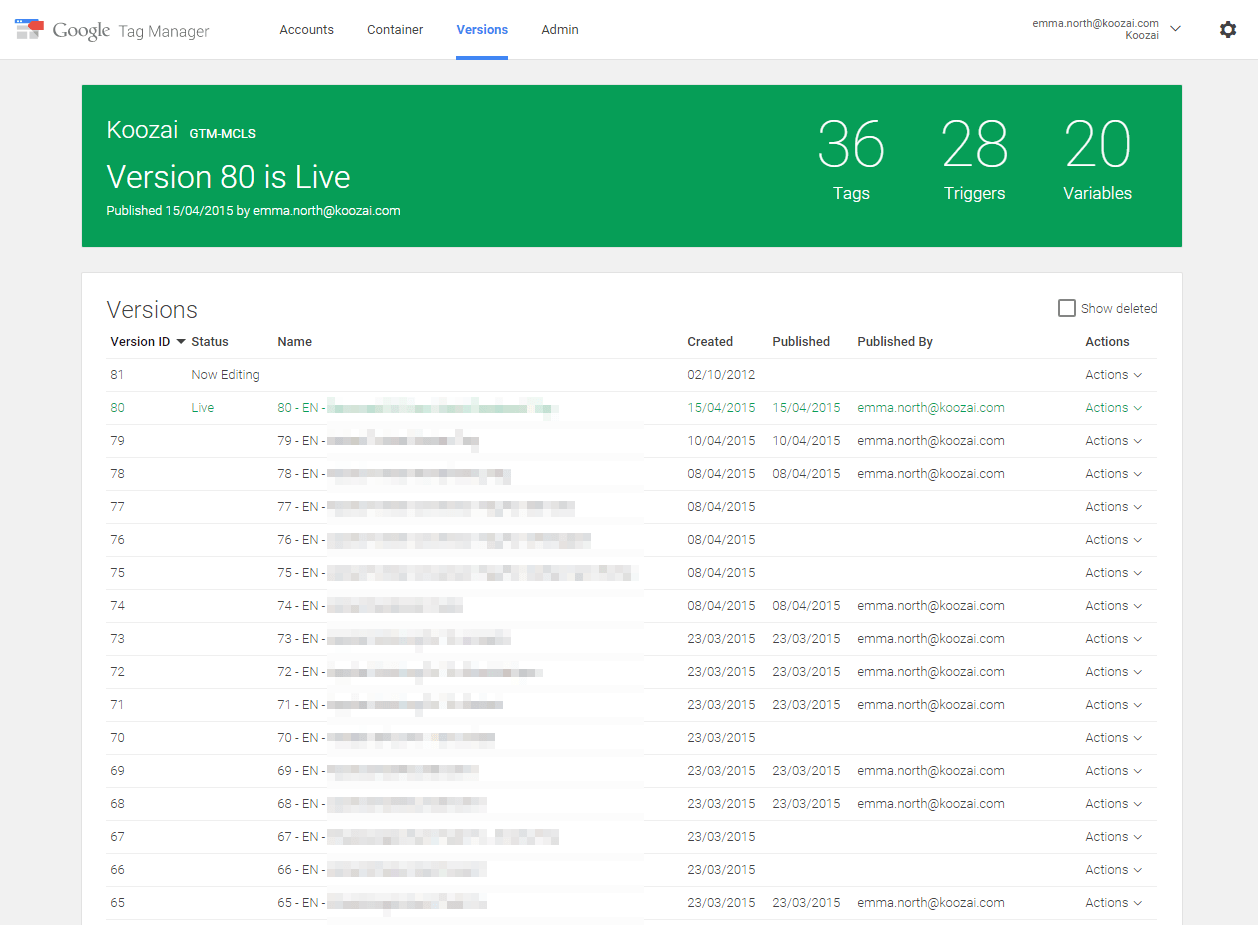
If you’ve used the first GTM, I recommend browsing around the various tabs and navigation menus to familiarise yourself with what’s new and where to find everything. You should find it much clearer and more intuitive, so getting to grips with the new style shouldn’t be like learning to use a completely new tool.
Migrating to Version 2
If you have not already migrated your V1 GTM accounts into V2 manually, they will have been automatically transferred on 1st June 2015. As such, there is no action you need to take in order to migrate or upgrade your accounts, but it’s definitely worth testing everything thoroughly to ensure your information was transferred in the way you’d expect.
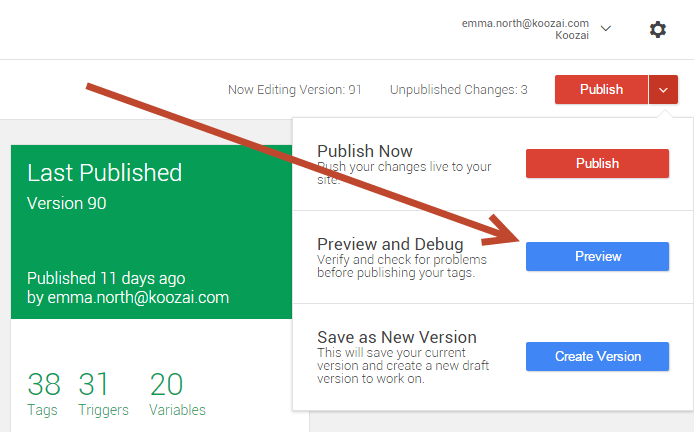
Use the Preview and Debug feature to run tests and make sure your tags are firing as they should:
Installing GTM
Setting up GTM on your site if you haven’t used the previous version is a straight forward process with prompts that guide you through the process. In short, you simply need to create an account and install the container code on your site.
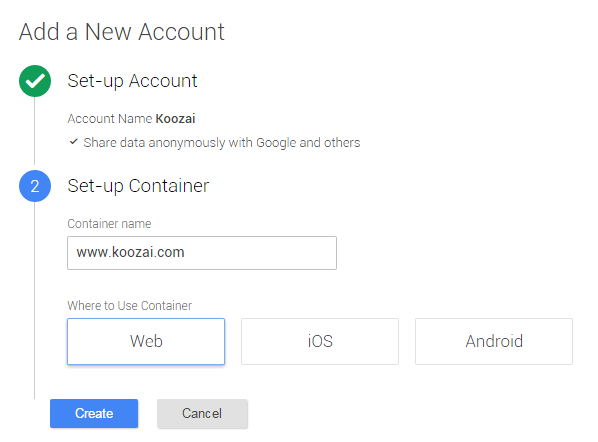
The GTM container code is provided after you enter some basic details (above) for your account and should be added immediately after the openingtag on every page of your site.
GTM Tags
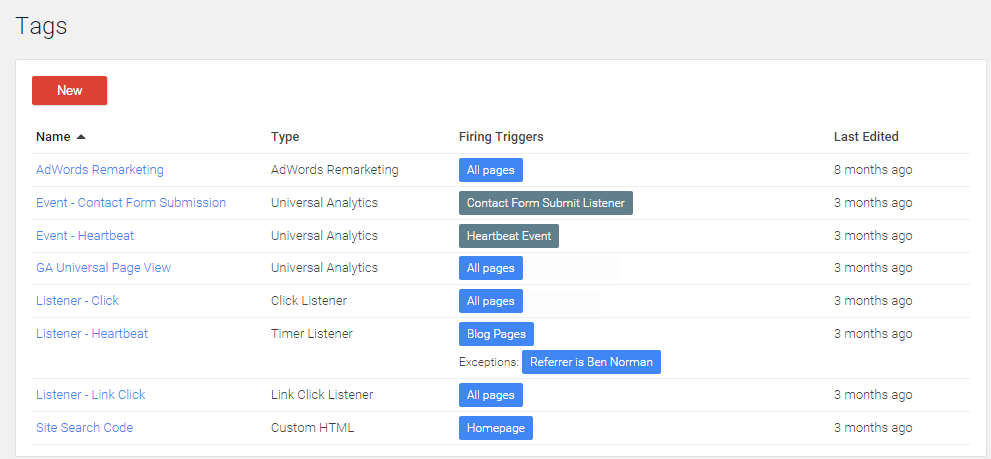
GTM is all about tags. Tags are the individual pieces of codes that are fired via the container you install when certain criteria, or Rules, are met.
There are many different types of tags, including both pre-set and custom tag options. Here is an example of just a few different tags you might need:
Setting Up A Google Analytics Tracking Tag
There are two main types of Google Analytics tag: Classic Google Analytics and Universal Analytics.
If you haven’t moved over to Universal Analytics yet, a move to GTM would be a good time to do so, as long as you test everything thoroughly at every step. Classic Google Analytics is being phased out and so the sooner you have accurate data tracking using Universal Analytics, the less work you’ll leave yourself in the future.
The main Google Analytics tag you’ll want to set up, even if you use no other tags at all, is a standard Page View tag to fire on all pages. This means that whenever a visitor views any of your pages, the Analytics tracking code fires and data about their visit is sent through to the Google Analytics interface:
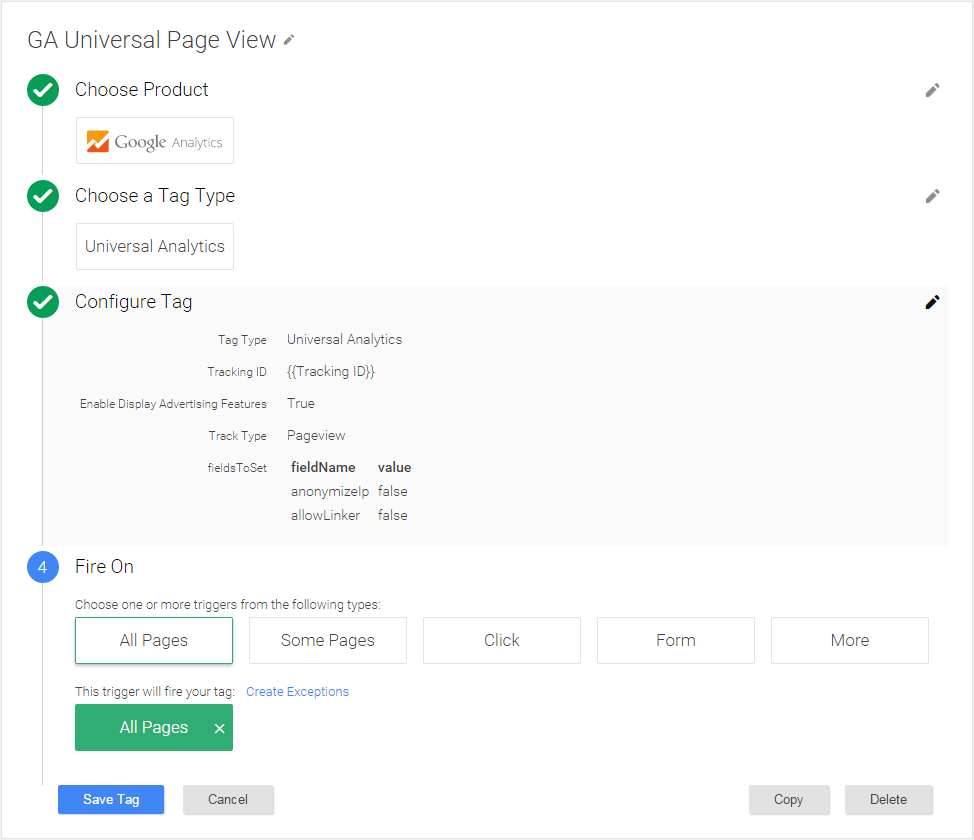
To create this tag, simply choose “Google Analytics” as the Product in the first section and choose either Universal Analytics or Classic Google Analytics as required in the second step.
Section 3 then asks you for your Tracking ID, which you can either enter manually (it’s your Google ID beginning with “UA-“) or you can create a Variable for your tracking ID so you only have to enter it once. For more information on setting up your Tracking ID variable, please download our free GTM whitepaper.
You can either use the little brick icon to browse for your Custom Variable or you can enter it in manually, in the format of {{trackingid}} – where “trackingid” is the name of the Tracking ID variable you created.
The last step is to tell Google when to fire the tag, which for your Google Analytics main tracking code tag will be on All Pages. Once you select the All Pages default Trigger, you can hit save and you’re done!
Google Tag Manager V2 Guide
For more information on Google Tag Manager or setting up Tags, Rules and Variables, please download our free GTM V2 whitepaper.
Alternatively, please feel free to Contact Koozai today and we’ll be happy to help you get started with this powerful tool.


Leave a Reply